Test Suites
Test Suites allow you to group multiple tests together and run them as a single batch. This is particularly useful for:
- CI/CD integration: Automate test execution in your deployment pipelines
- Regression testing: Run comprehensive test sets to validate application changes
- Organized testing: Group related tests by feature, module, or test type
- Parallel execution: Run multiple tests simultaneously to reduce overall execution time
Creating a Test Suite
You can create a new test suite primarily using two methods:
Method 1: From the Tests Page
This is the most common way to create a test suite when you already know which tests you want to group together:
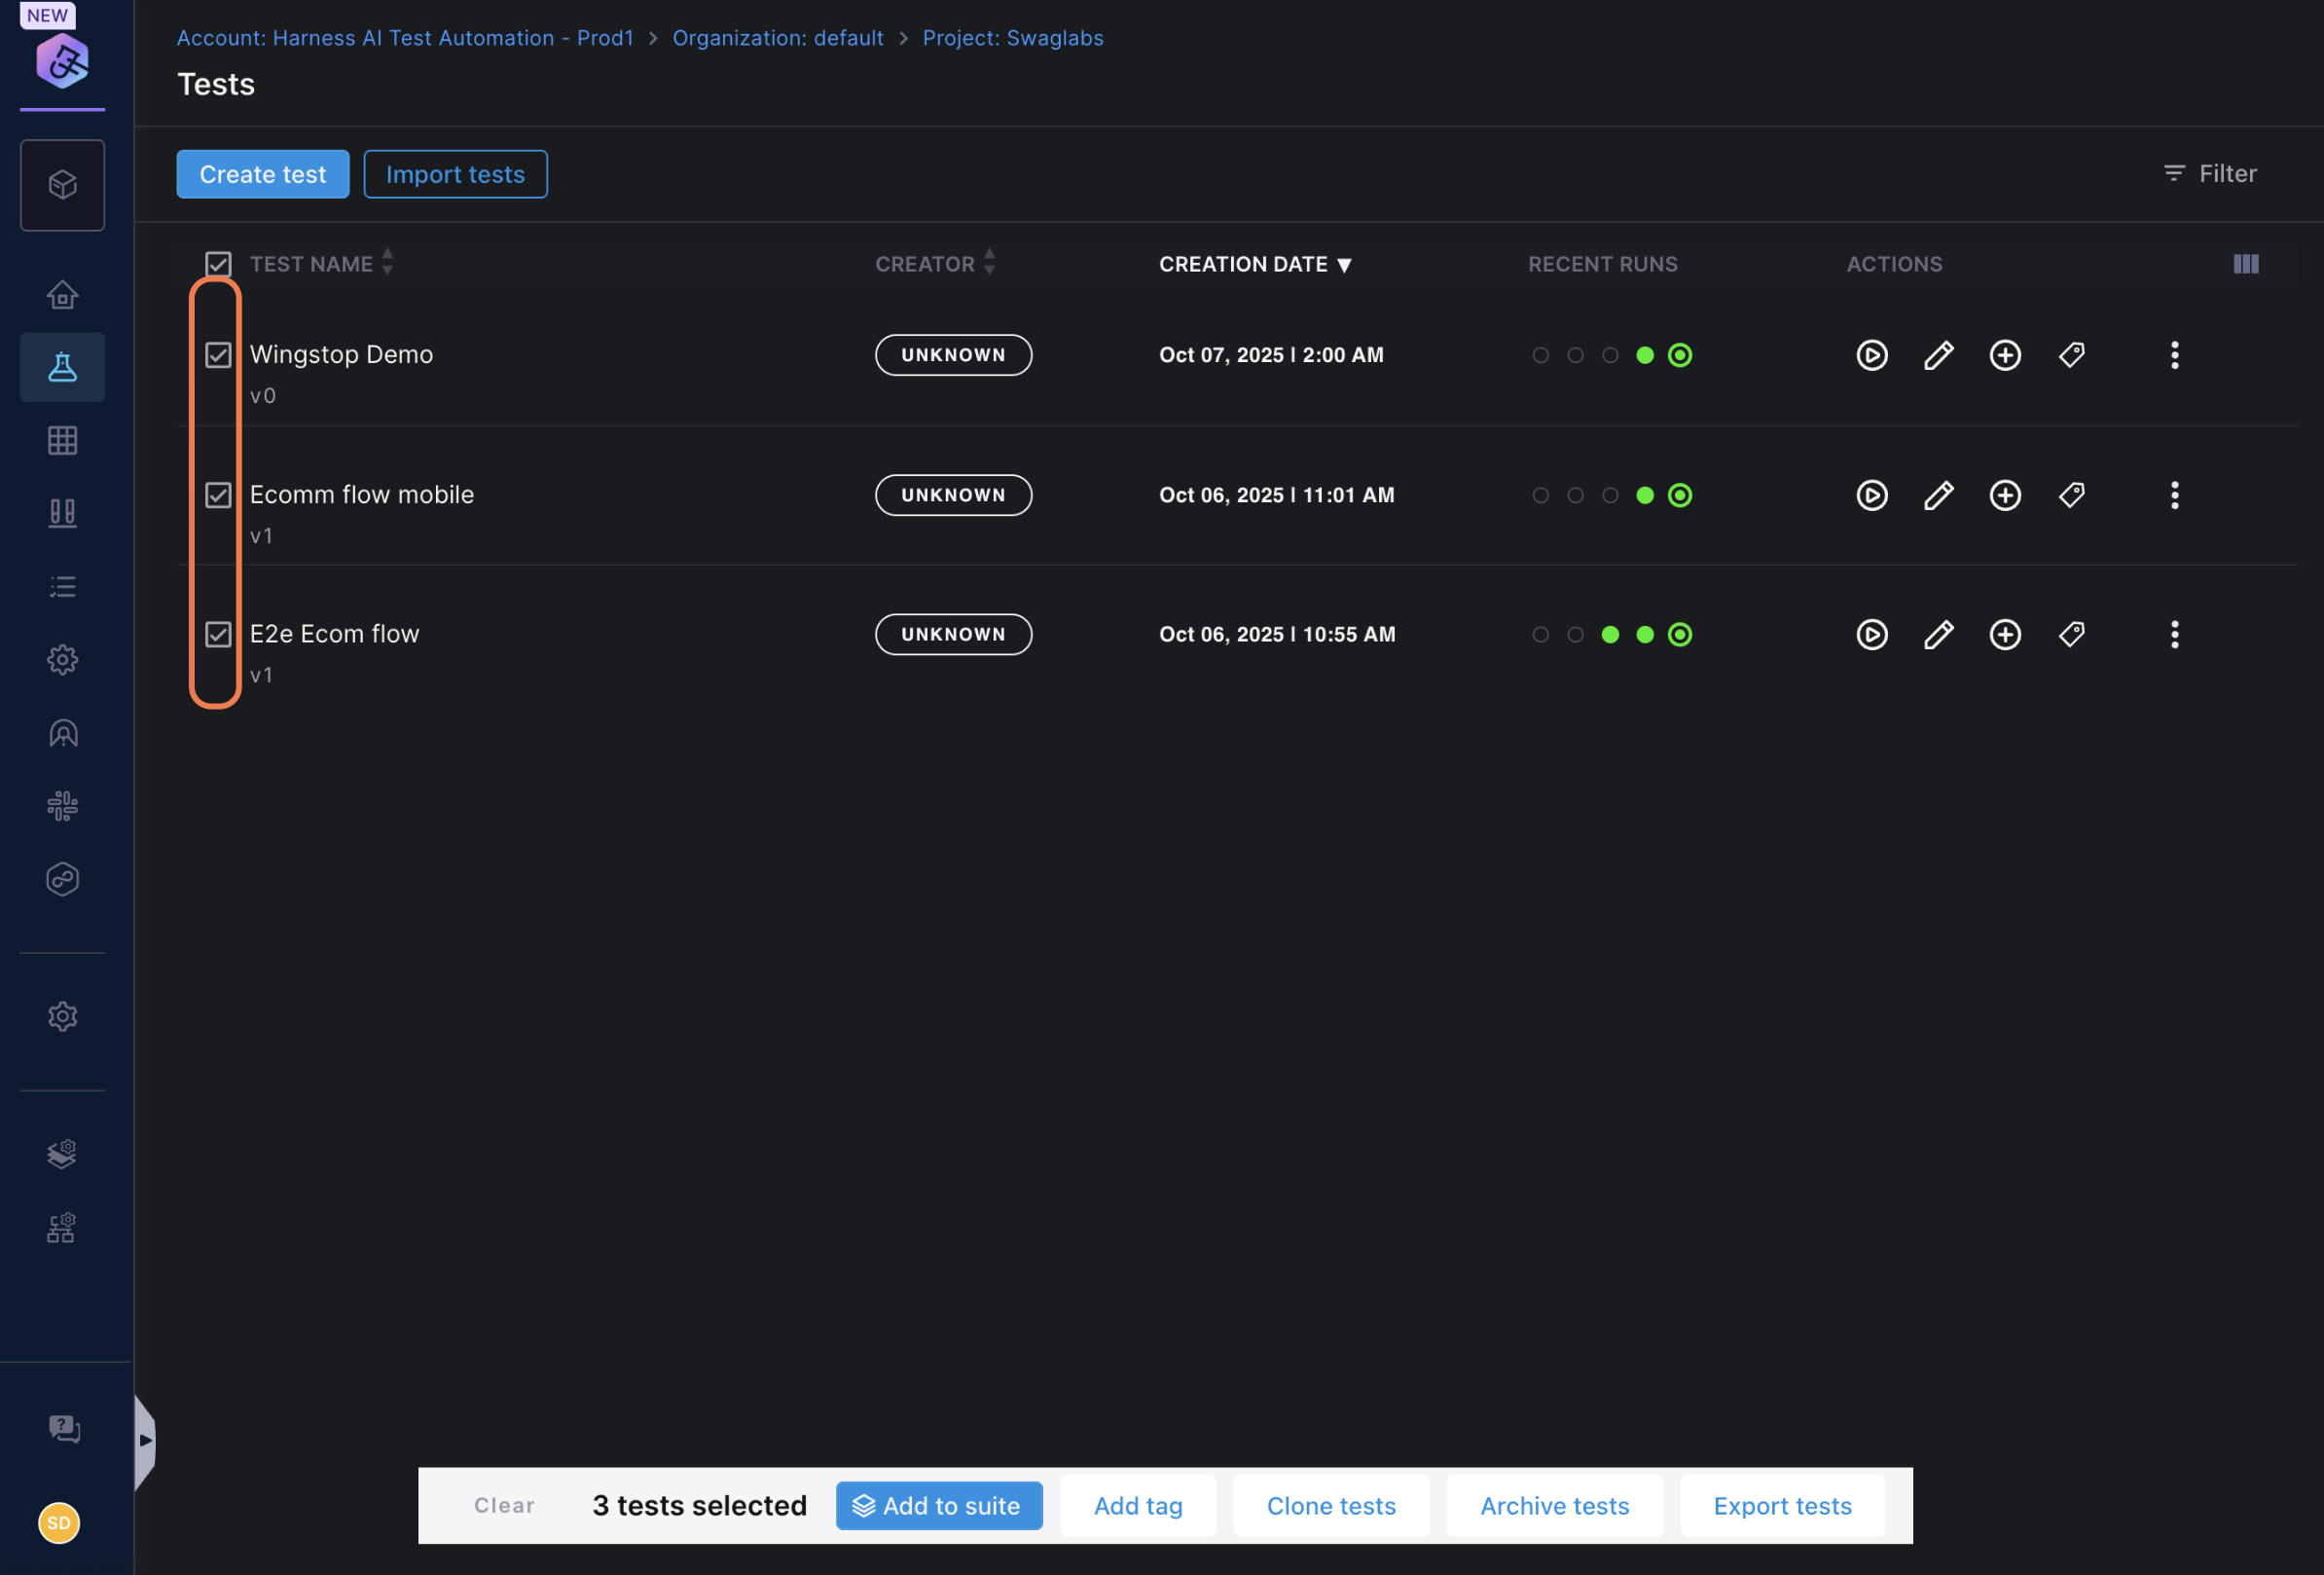
- Navigate to the Tests tab in your project
- Select one or more tests using the checkboxes
- Click Add to Suite at the bottom of the page
- In the dialog that appears:
- Create a new suite: Enter a name for your new test suite
- Add to existing suite: Select an existing suite from the dropdown
- Click Create or Add to confirm
Method 2: Direct Creation
Alternatively, you can create an empty test suite first and add tests later:
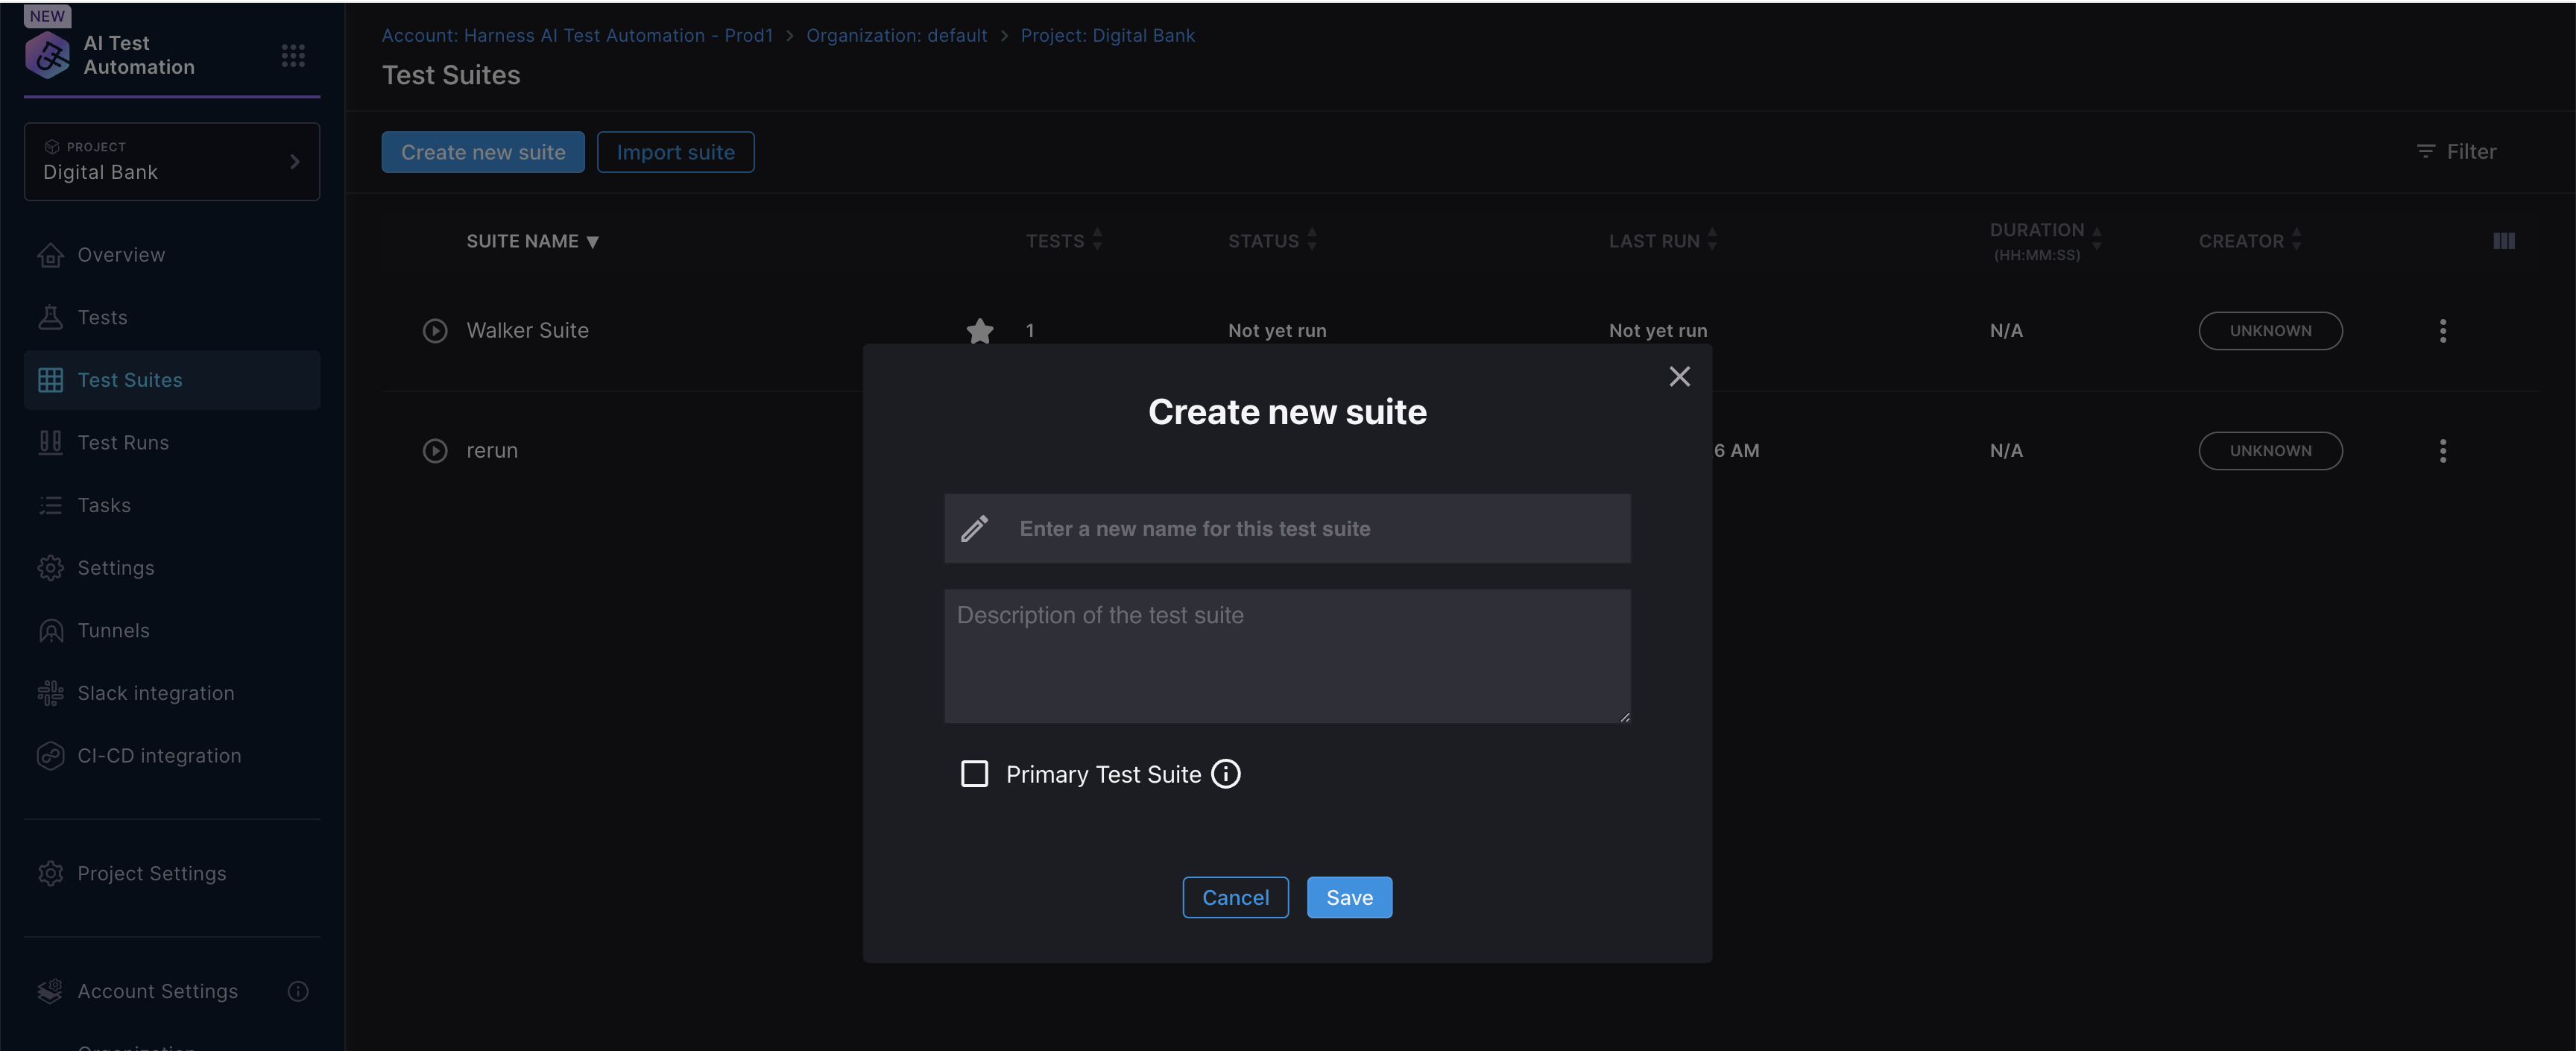
- Navigate to the Test Suites tab from the left navigation
- Click Create new suite button
- Provide the following details:
- Suite name: A descriptive name for your test suite
- Description (optional): Additional context about the suite's purpose
- Click Create
- Once created, you can add tests by clicking Add tests within the suite
Managing Test Suite Configuration
Tests Tab
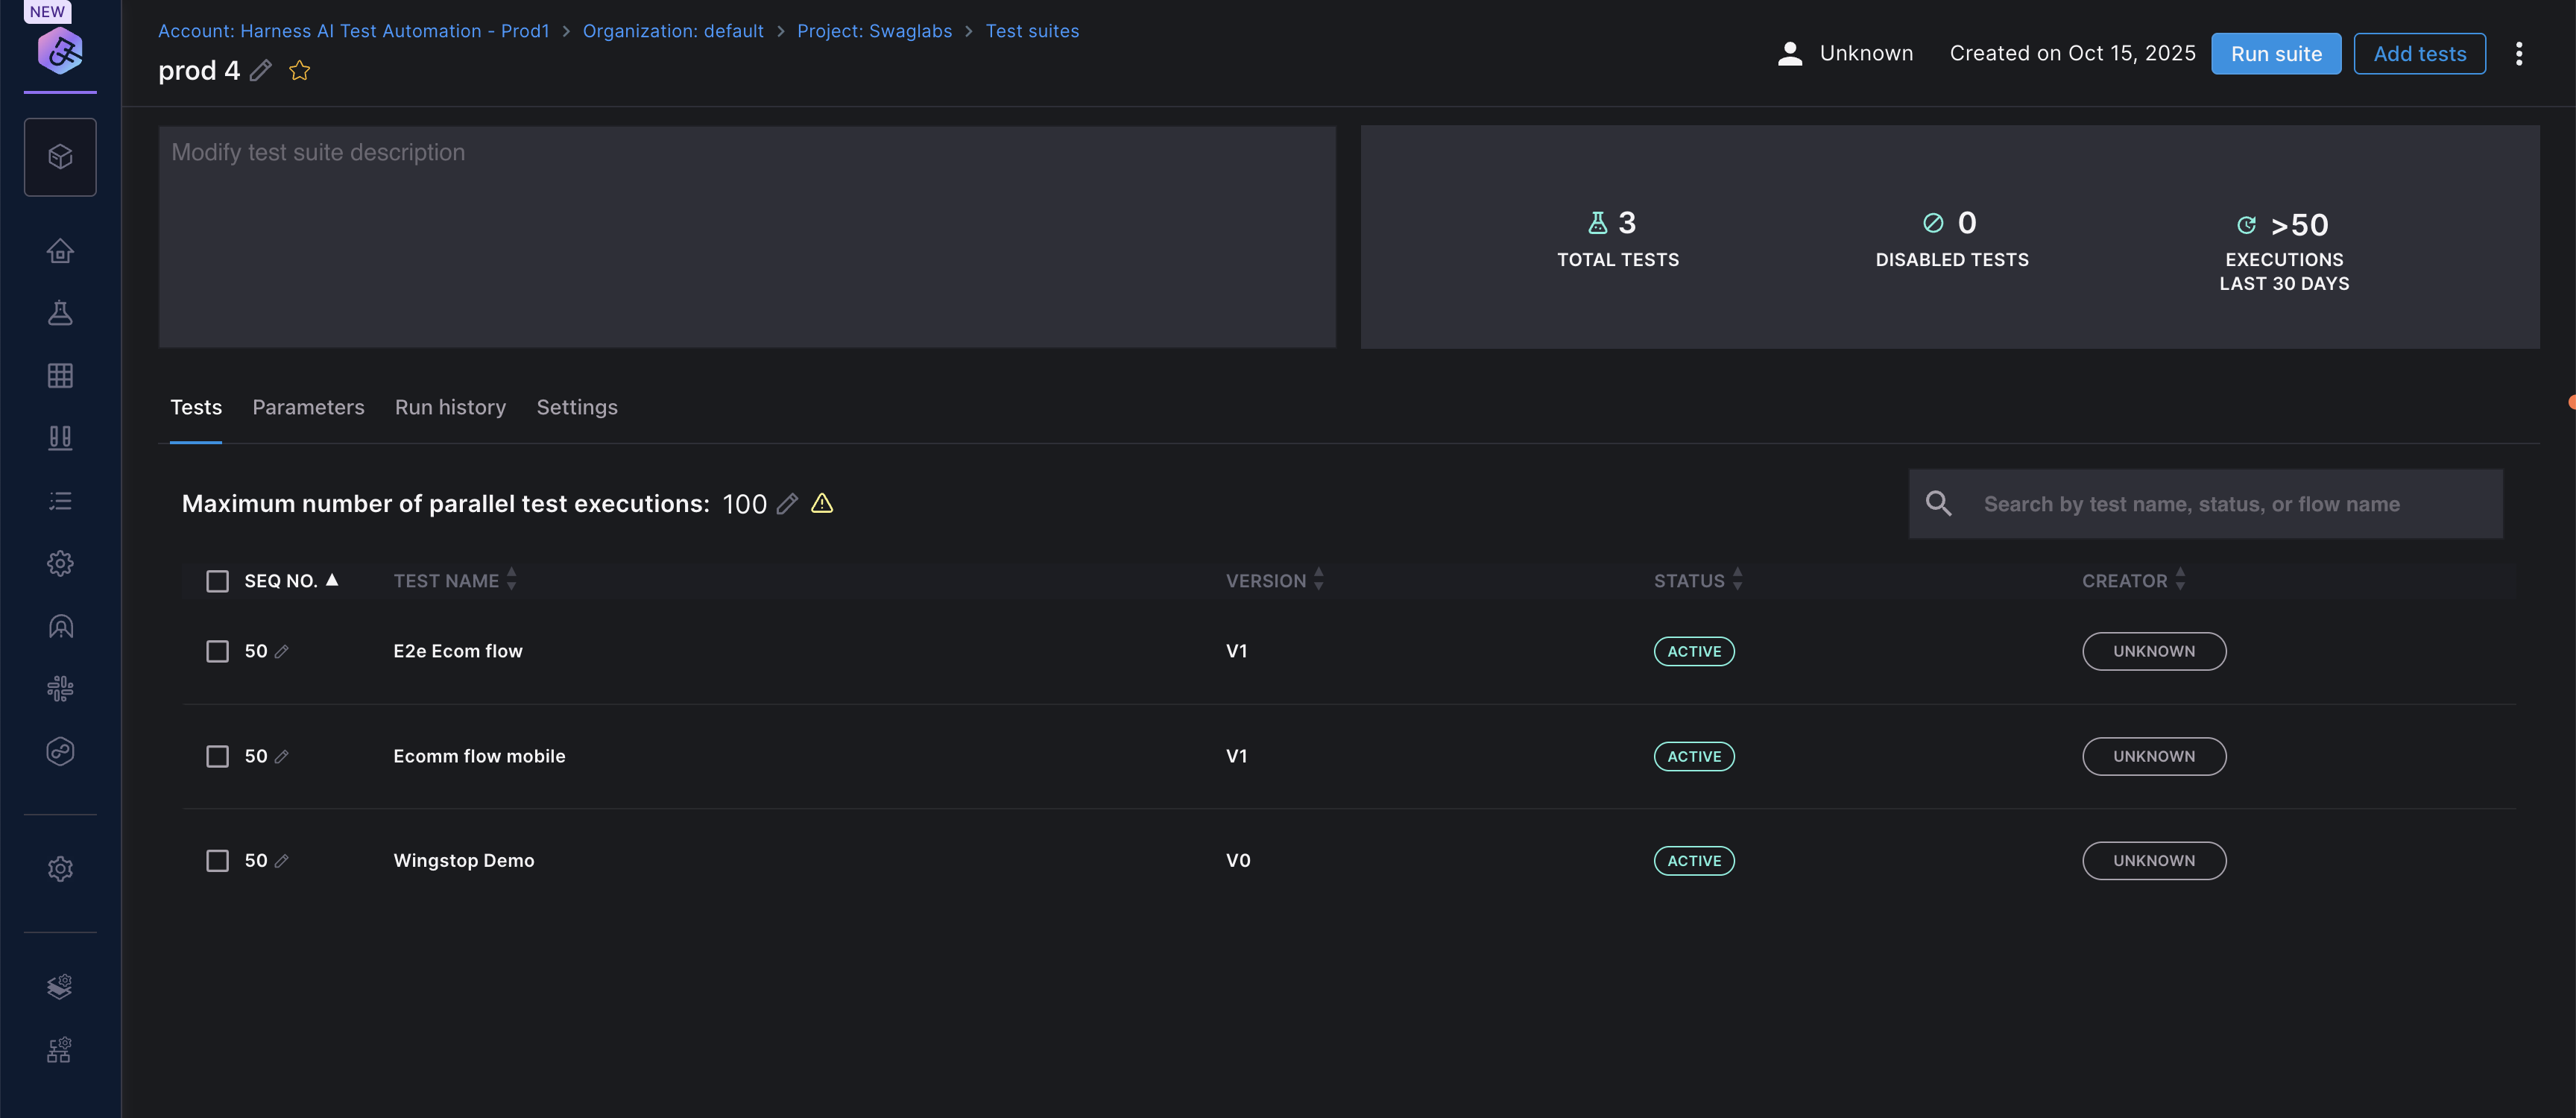
View and manage all tests included in the suite:
- Add tests: Click Add tests to include additional tests
- Remove tests: Select tests and remove them from the suite
- Reorder tests: Change test execution sequence
- View test details: Click on any test to see its configuration
Sequencing and Parallel Execution
Understanding Sequence Numbers
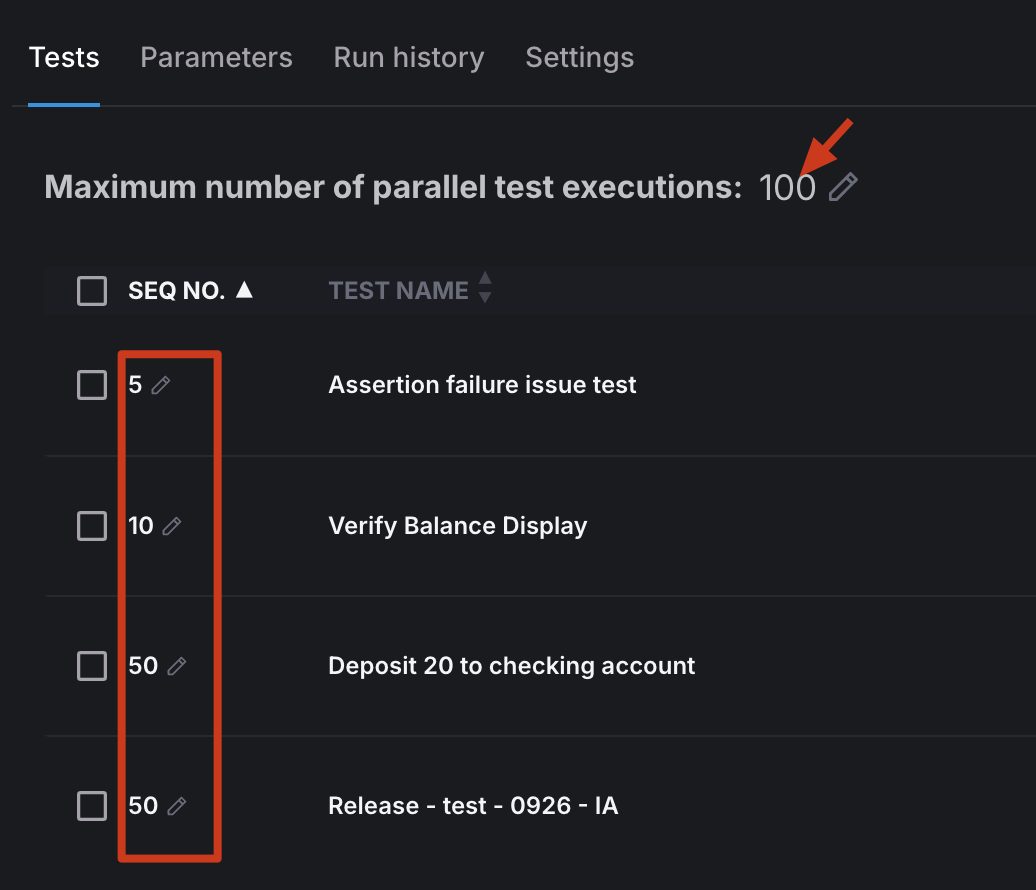
By default, all tests in a suite have a sequence number of 50, meaning they can run in any order (parallel execution).
To control execution order:
- Go to the Tests tab in your suite
- Click the pencil icon next to SEQ NO
- Assign sequence numbers:
- Lower numbers run first (e.g., 10 runs before 20)
- Same numbers run in parallel (e.g., all tests with 50 run together)
- Higher numbers run later (e.g., 100 runs after 50)
Example sequencing strategy:
- Sequence 10: Setup/prerequisite tests
- Sequence 50: Main functional tests (run in parallel)
- Sequence 100: Cleanup/teardown tests
Tests can have a negative sequence number (e.g., -10). The negative sign indicates that if the test fails, the test suite will abort. This is typically used for setup tests where subsequent tests cannot proceed if the setup fails.
Maximum Parallel Executions
Control how many tests run simultaneously:
- In the suite details page, find Maximum number of parallel test executions
- Click the edit icon
- Set your desired value (default is 100)
- Lower values reduce resource usage but increase total execution time
Parameters Tab
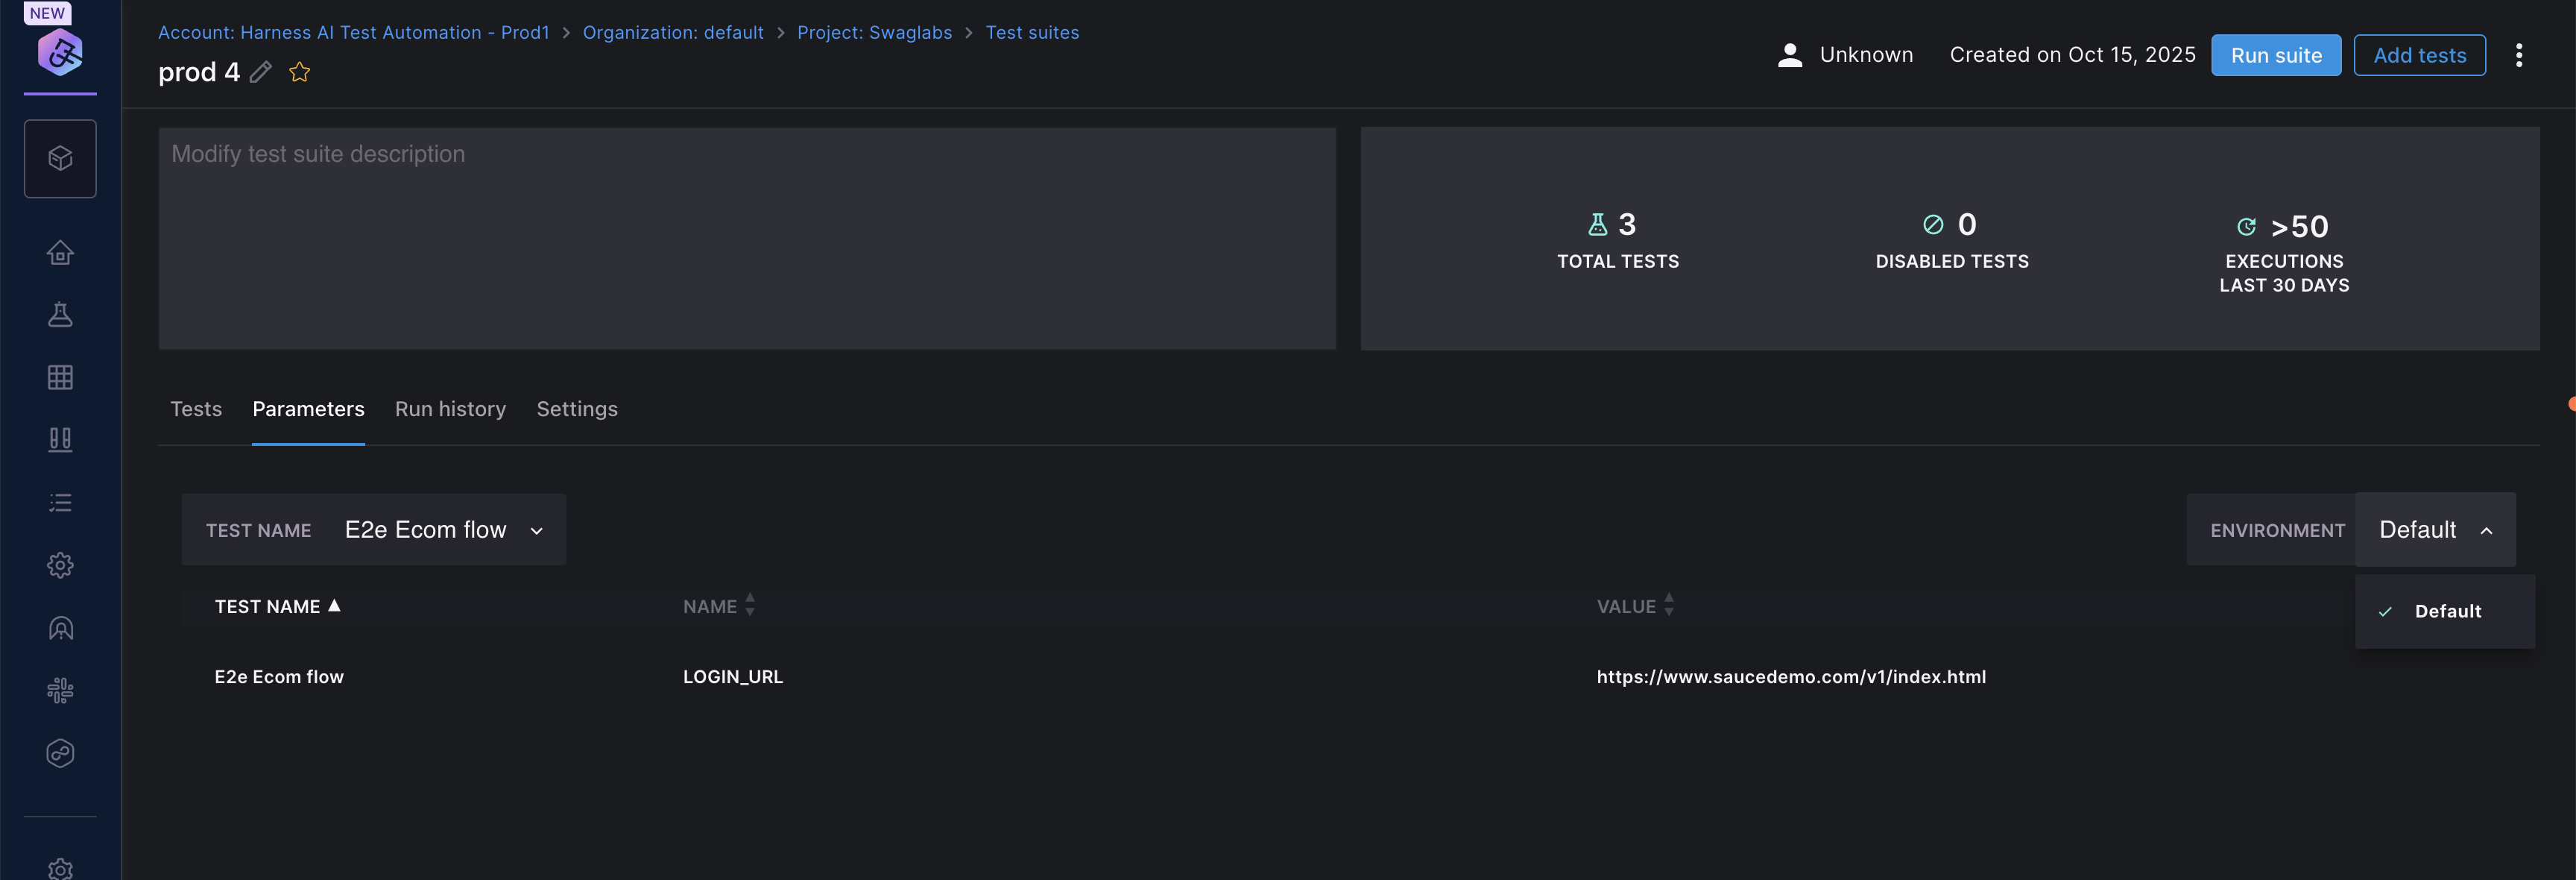
The Parameters tab provides an overview of the test parameters defined for each environment. You can use it to inspect the key-value pairs associated with a specific test and switch between environments to see how the configuration varies.
Selecting an environment updates the displayed parameter values accordingly. This helps users verify environment-specific configurations without editing them.
Example
| Field | Description |
|---|---|
| Test Name | Displays the selected test for which parameters are being viewed |
| Name | Parameter key or variable name |
| Value | Value assigned to the parameter key |
| Environment | Environment selector to switch parameter views |
Run History Tab
Track all past executions of your test suite:
- View execution timestamp
- Check status (Completed, Failed, Running)
- Review duration and test results
- Click on any run to see detailed results
Re-run Test Suite and Tests
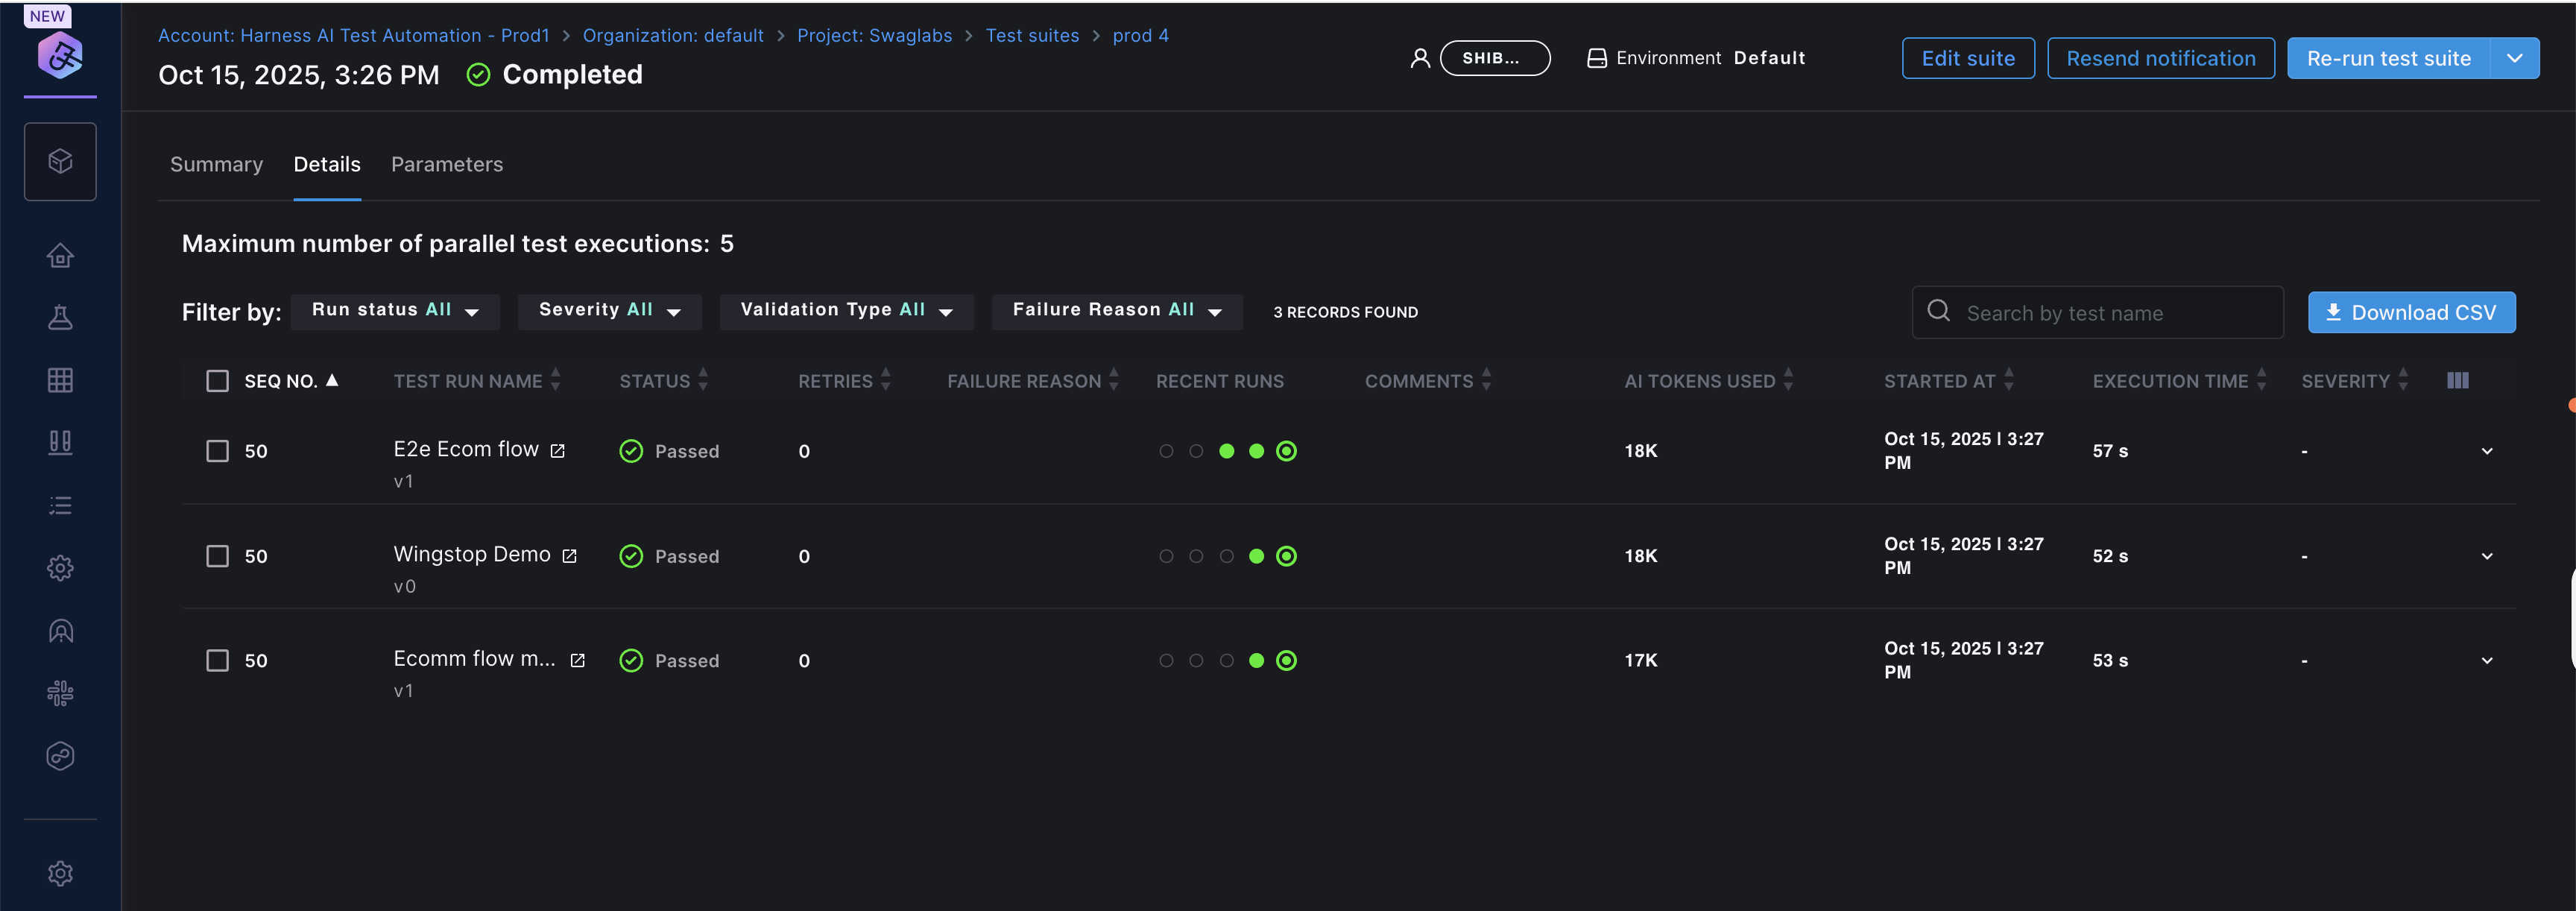
You can re-run test suites or individual tests:
Quick Access Method:
- From the Test Suites list page, locate your test suite
- Click on the Last Run column for that test suite
- This takes you directly to the details page where you can:
- Re-run test suite: Re-execute the entire test suite
- Run failed tests: Quickly re-run only the tests that failed
- Select individual tests: Choose specific tests to re-run by selecting them from the list
From Run History Tab:
- Navigate to the Run History tab within a test suite
- Click on a test run to open its details page
- In the Details tab, you have the same re-run options as above
This allows you to efficiently debug and validate fixes without running the entire suite every time.
Settings Tab
Configure suite-level settings including scheduling and notifications.
Scheduling and Notifications
Scheduling Test Runs
- In the Scheduling section, enter a cron expression
- Save your configuration
Example cron expressions:
0 4 * * *- Run daily at 4:00 AM UTC0 0 * * 1- Run every Monday at midnight UTC0 */6 * * *- Run every 6 hours
Use crontab.guru to create and validate cron expressions.
Setting Up Notifications
Get notified when test suite execution completes:
- In the Notification section, configure notification channels:
- Slack: Enter your Slack channel name
- Email: Enter email addresses (comma-separated)
- Save your configuration
You'll receive notifications after every scheduled or manual execution.

Test Execution
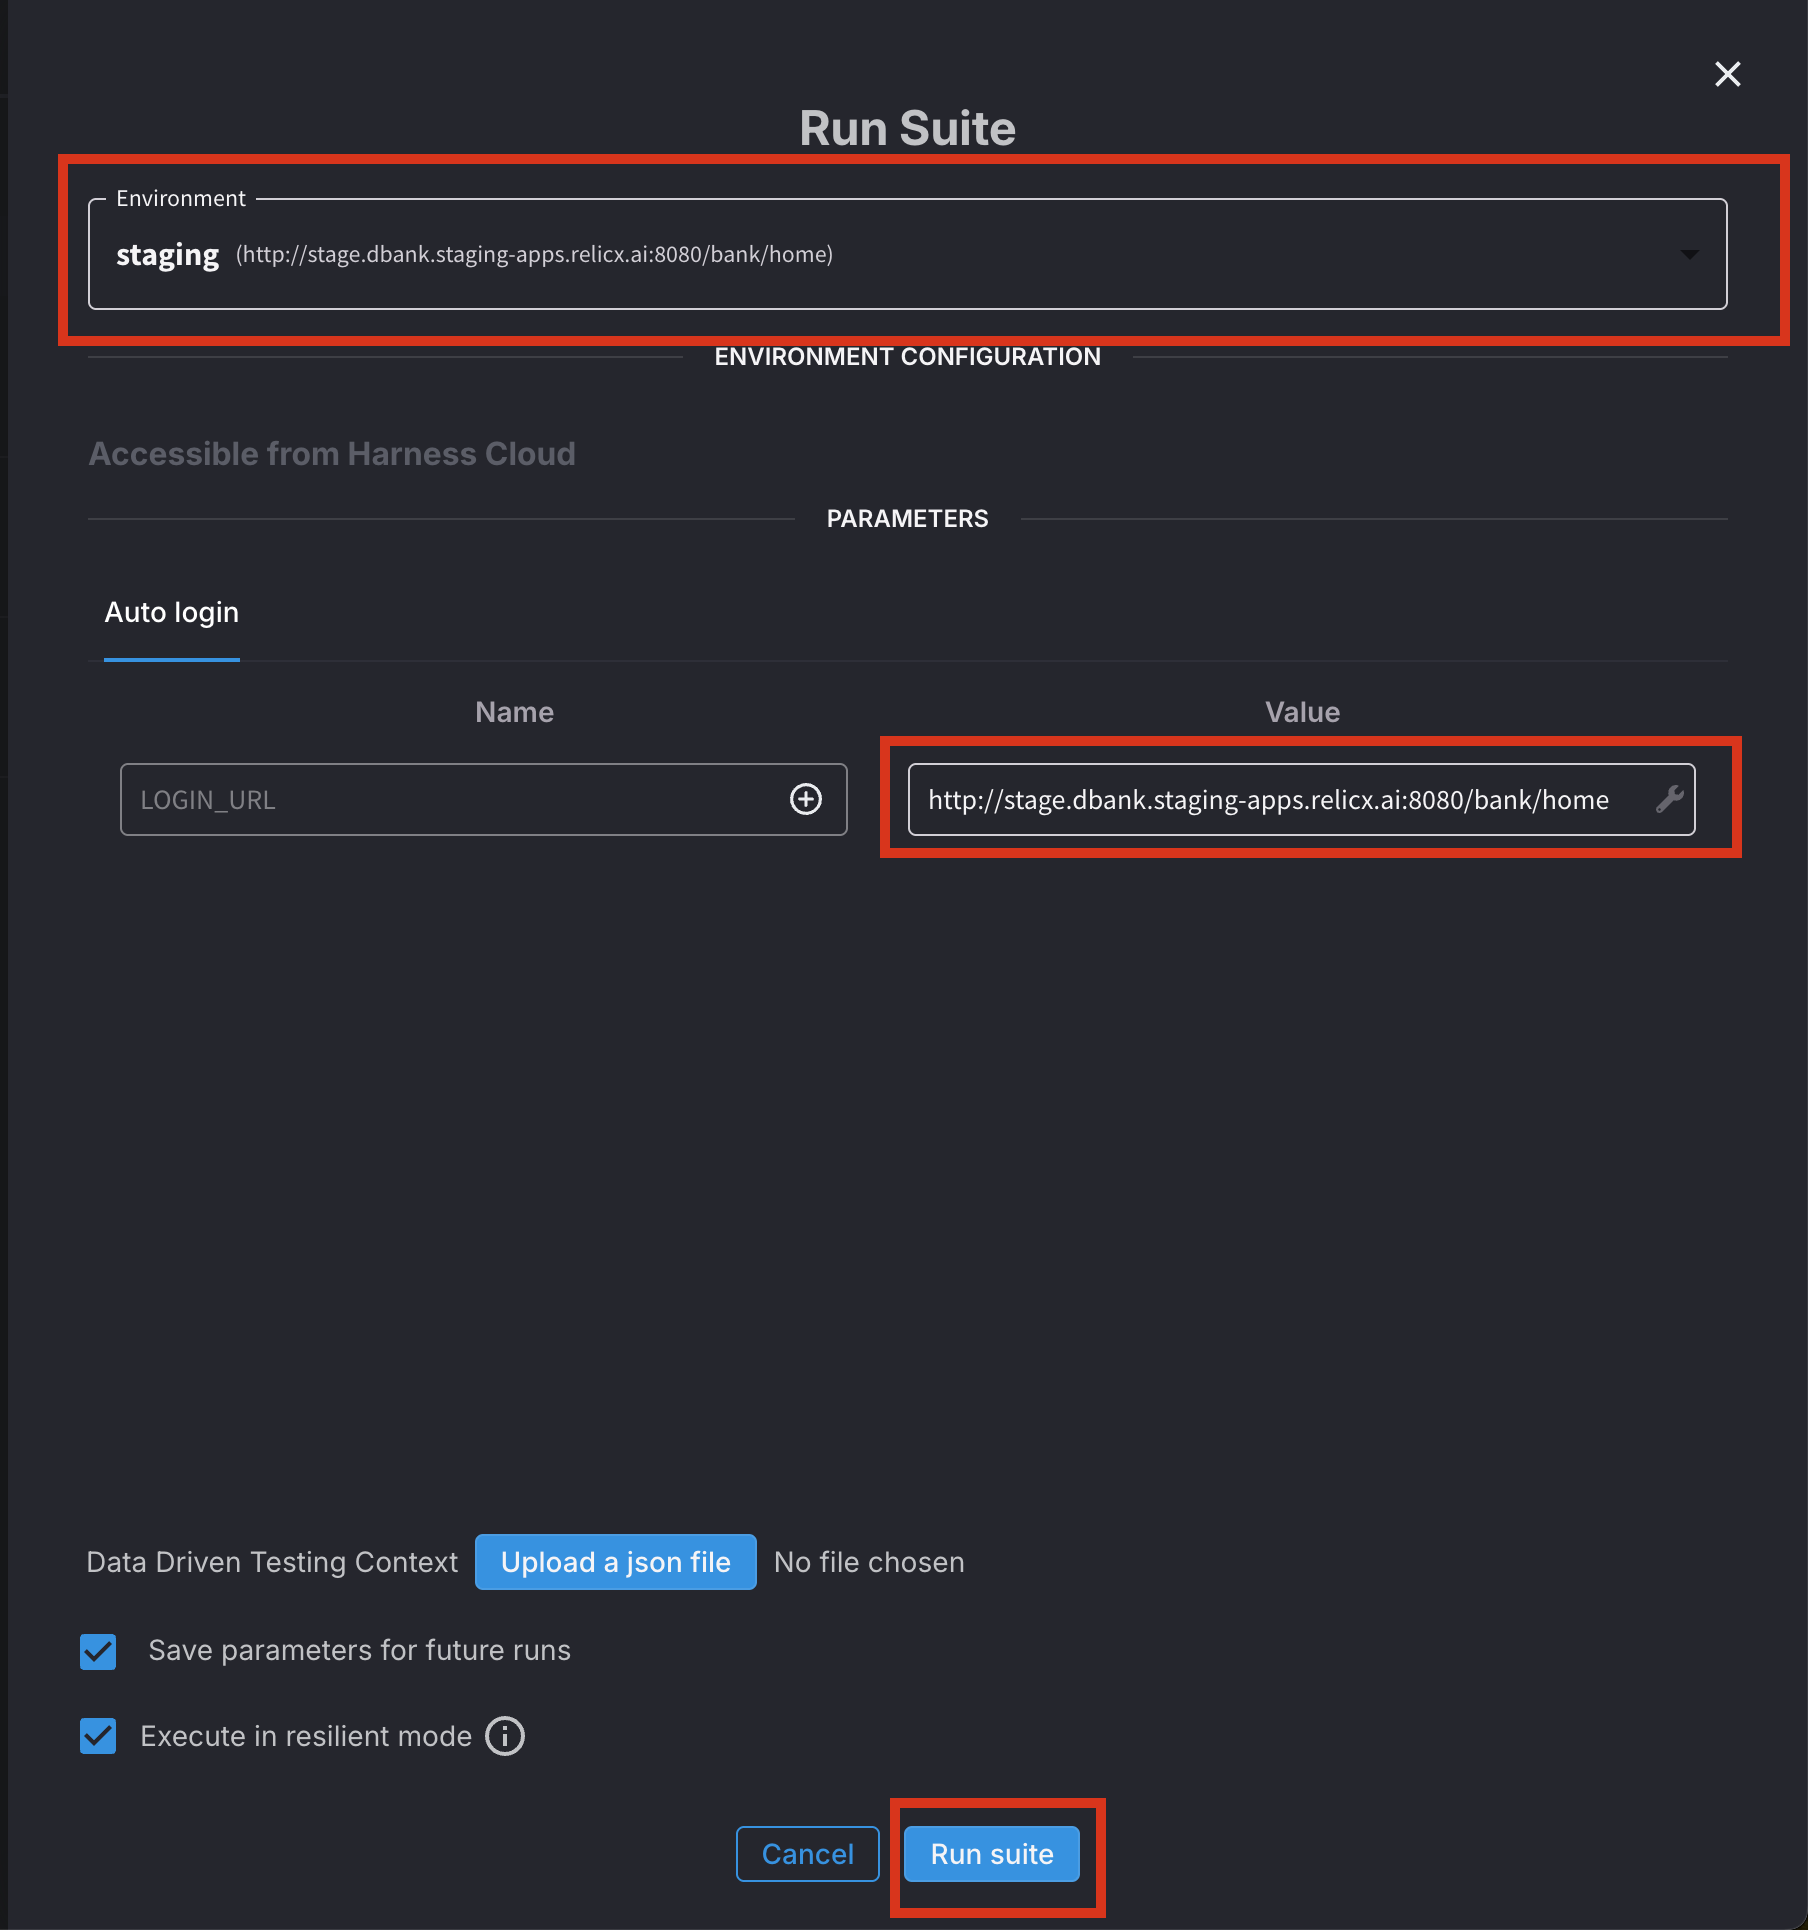
Running a Test Suite
- Navigate to your Test Suite
- Click Run suite in the top-right corner
- Select the target environment
- Review and modify parameters if needed
- Click Run to start execution
Tests in the suite run with default parameters and can be bulk edited before execution.
Execution Behavior
- Tests run in parallel by default (up to the configured maximum)
- Tests with the same sequence number run in parallel
- Tests with different sequence numbers run in order
- Failed tests don't block other tests from running
Video Tutorial
Watch this overview of Test Suites in Harness AI Test Automation: